
The Ultimate Vanilla Bean Layer Cake: A Timeless Recipe for Every Celebration
There’s a reason a vanilla cake is a cornerstone of the baking world. Deceptively simple, a truly great vanilla cake is a masterpiece of flavor and texture—moist, tender, and aromatic with the pure, fragrant essence of real vanilla. It’s a blank canvas for creativity and a comforting classic all at once.
This isn’t just any vanilla cake. This is a celebration cake. It’s tall, beautifully layered, and swathed in a cloud of the creamiest vanilla buttercream. It’s the cake you make for birthdays, anniversaries, or just to turn an ordinary Tuesday into something special. Forget the box mixes; the magic is in the scratch-making.
Why This Recipe Works
The secret to this cake’s flawless crumb lies in the “reverse creaming” method. Unlike traditional creaming where butter and sugar are whipped first, here the dry ingredients and butter are blended together. This coats the flour proteins in fat, inhibiting gluten development and resulting in a cake that is exceptionally tender and fine-crumbed, with a velvety texture that rivals a professional bakery.
Ingredients: Quality is Key
For a cake this simple, every ingredient matters.
For the Vanilla Cake:
2 ½ cups (315g) cake flour, sifted
2 cups (400g) granulated sugar
1 tablespoon baking powder
1 teaspoon fine sea salt
1 cup (2 sticks / 226g) unsalted butter, cold and cubed
4 large eggs, at room temperature
1 cup (240ml) whole milk, at room temperature
½ cup (120g) sour cream, at room temperature
2 teaspoons pure vanilla extract
Seeds scraped from 1 vanilla bean pod (or 1 additional tsp extract)
For the Vanilla Bean Buttercream:
2 cups (4 sticks / 452g) unsalted butter, slightly softened
5 cups (625g) powdered sugar, sifted
2 tablespoons heavy cream or whole milk
2 teaspoons pure vanilla extract
Seeds scraped from 1 vanilla bean pod
A pinch of salt
The Method: A Step-by-Step Guide
1. Prepare and Preheat: Preheat your oven to 350°F (175°C). Grease, line with parchment paper, and flour three 8-inch round cake pans. Ensuring your pans are properly prepared is non-negotiable for easy release.
2. Combine Dry Ingredients: In the bowl of a stand mixer fitted with a paddle attachment, combine the cake flour, sugar, baking powder, and salt. Mix on low for 30 seconds to combine.
3. The Reverse Cream: With the mixer on low, add the cold, cubed butter a few pieces at a time. Continue mixing until the mixture resembles coarse, sandy crumbs. This should take about 3-4 minutes.
4. Combine Wet Ingredients: In a separate medium bowl or large measuring jug, whisk together the eggs, milk, sour cream, vanilla extract, and vanilla bean seeds until smooth.
5. Bring it Together: With the mixer on medium-low, slowly pour the wet ingredient mixture into the dry ingredients in three parts, scraping down the bowl after each addition. Once the last addition is in, mix on medium speed for 30 seconds to ensure it’s perfectly smooth. The batter will be slightly thick.
6. Bake: Divide the batter evenly between your prepared pans. Bake for 25-28 minutes, or until a wooden skewer inserted into the center comes out clean. The cakes will be lightly golden and will spring back when touched.
7. Cool Completely: This is crucial! Let the cakes cool in their pans for 10 minutes before inverting them onto a wire rack to cool completely. Wrapping the layers in plastic wrap and chilling them for at least an hour makes them easier to frost.
8. Make the Buttercream: While the cakes cool, make the frosting. In a clean stand mixer bowl with the paddle attachment, beat the butter on medium speed for 5 minutes until it is very pale and fluffy. Reduce speed to low and gradually add the sifted powdered sugar until incorporated. Add the heavy cream, vanilla extract, vanilla bean seeds, and salt. Increase speed to medium-high and whip for a full 3 minutes until incredibly light and airy.
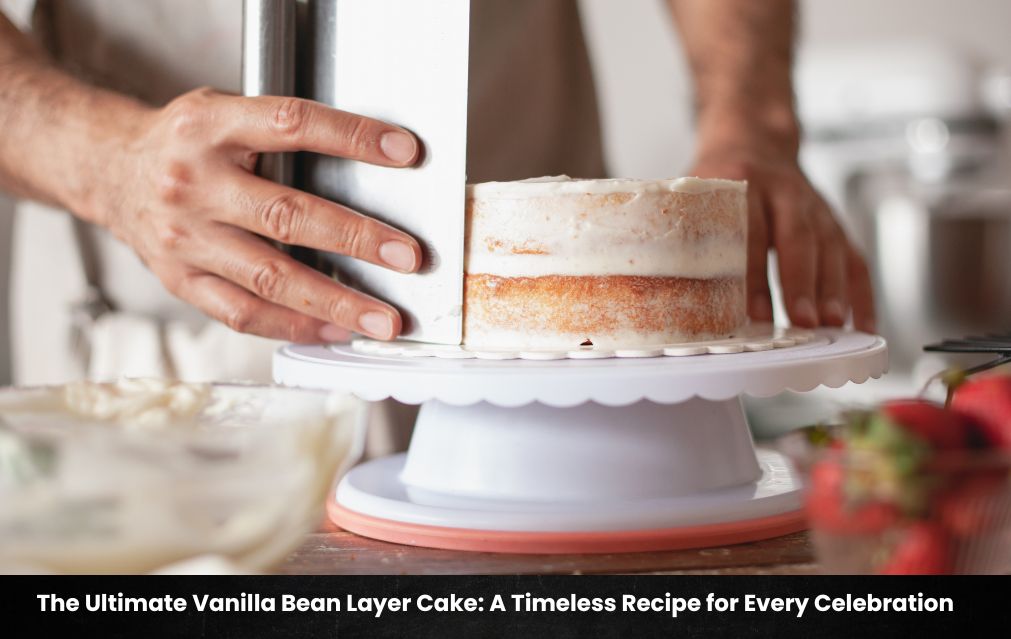
Assembly and Decoration
Place your first cake layer on a serving plate or cake board. Spread a generous cup of buttercream evenly over the top. Repeat with the second layer. Place the final layer top-side down for a perfectly flat surface.
Apply a thin “crumb coat” of frosting over the entire cake to seal in any loose crumbs. Chill for 15 minutes. Apply a final, thick layer of frosting, smoothing the sides and top with an offset spatula or bench scraper.
For a classic finish, use a piping bag to create swirls on top, or simply leave it elegantly smooth. Decorate with sprinkles, fresh berries, or edible flowers.
The Final Slice
This Vanilla Bean Layer Cake is more than just a dessert; it’s a labor of love. The flavor of real vanilla shines through in every bite, supported by a rich, tender crumb and the lightest, creamiest buttercream. It’s a testament to the fact that with the right technique, the simplest flavors can be the most extraordinary.